Uploading Files to monday.com
The monday connector in Power Automate doesn't have a native way to upload files to monday.com. But files can be uploaded using the HTTP action in Power Automate.
This guide walks through the process of uploading a file to a files column in monday.com when an item is created in a monday.com board. In this example, the file is retrieved from SharePoint, but you can retrieve the file from a different service as well.
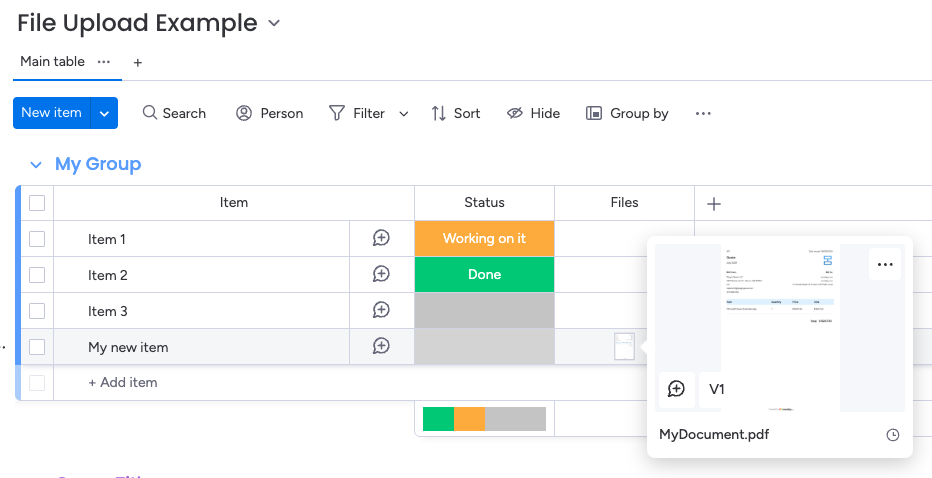
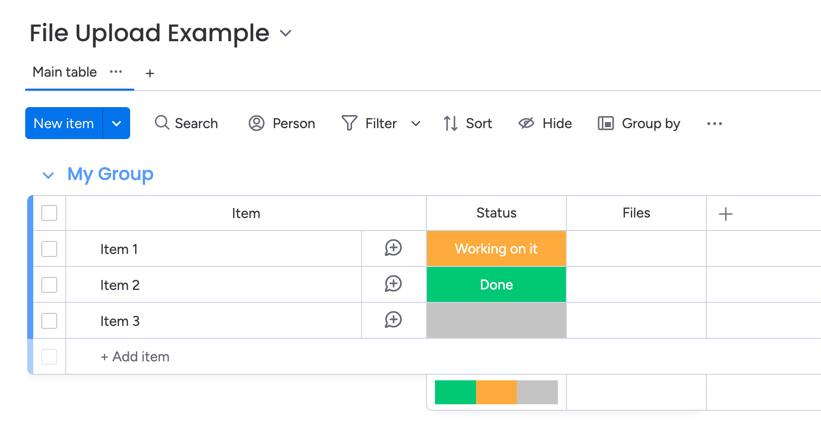
Example Board in monday.com
For this example, we will upload a file from SharePoint every time a new item is added to a monday.com board.
Below is what our monday.com board looks like. Notice how we have a Files column where we will upload the file to when an item is created.
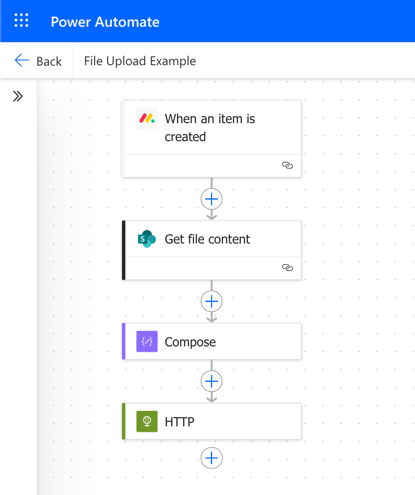
Flow in Power Automate
Below is an overall view of the flow we will be creating. Next, I will show you how to create this flow step-by-step.
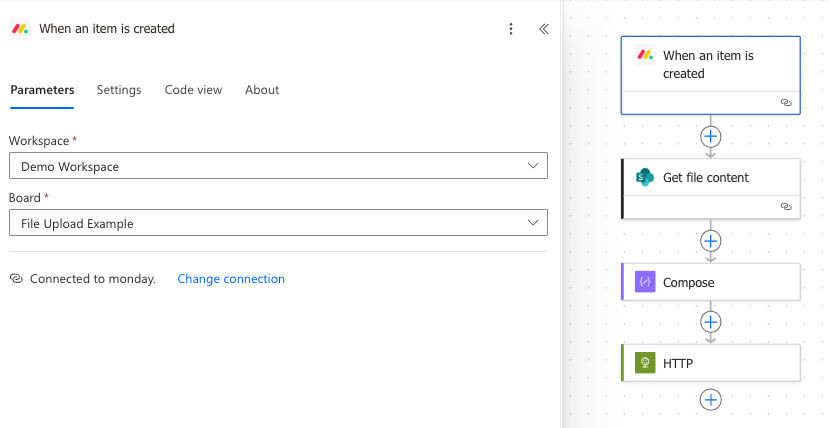
Step 1: Add a "When a new item is created" trigger
First, we will add the monday connector "When an item is created" trigger. This trigger will run the flow when a new item is created in our monday.com board.
Select the workspace and board you want to monitor for new items.
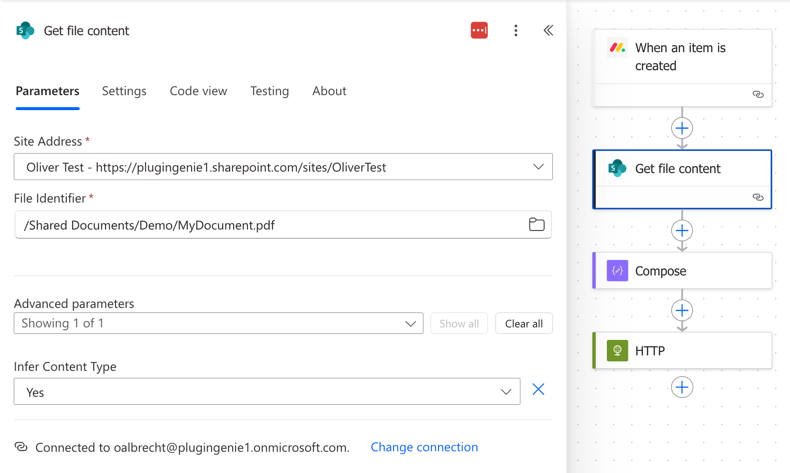
Step 2: Get file content from SharePoint
Next, we will use the SharePoint "Get file content" action to get the file content from SharePoint. This is the file that we will be uploading to monday.com.
Select the Site Address and File Identifier for the file you want to upload to monday.com.
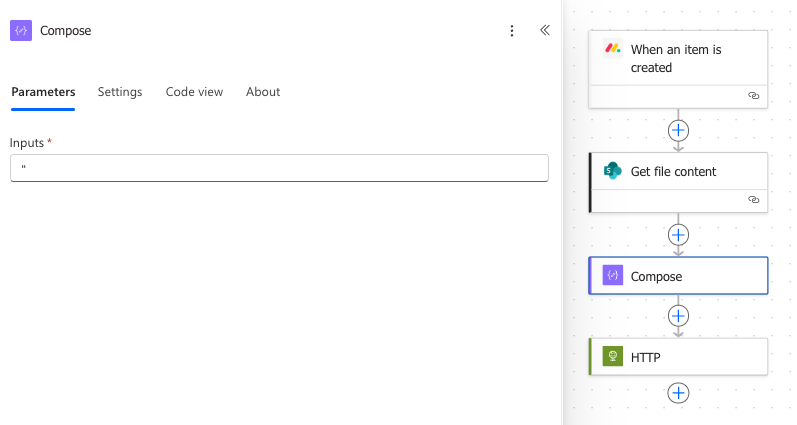
Step 3: Add a Compose action
Next, we will add a Compose action to use later in the HTTP action. The compose action will just contain a single double quote character (").
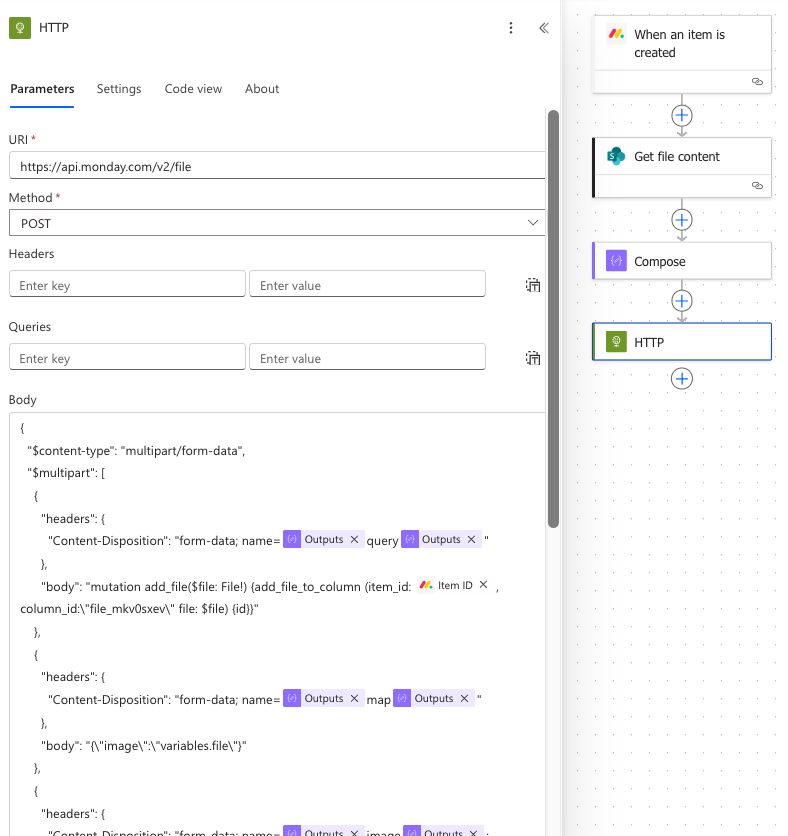
Step 4: Add an HTTP action to upload the file to monday.com
Next, we will add an HTTP action to upload the file to monday.com. Below shows what this will look like.
Here is the first part of the HTTP action:
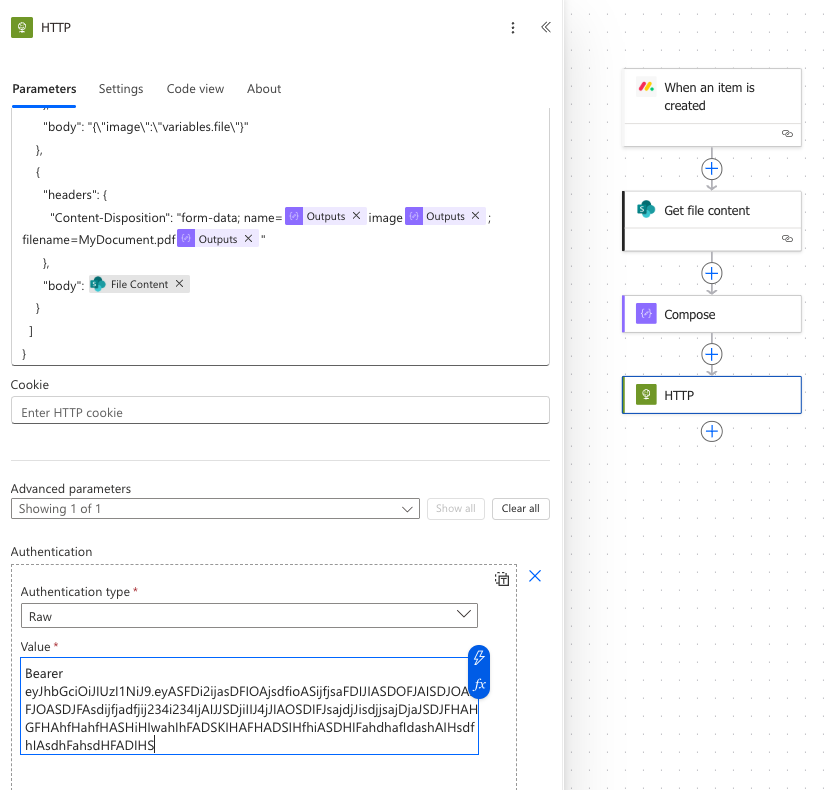
Here is the second part of the HTTP action:
URI and Method
Set the URI to https://api.monday.com/v2/file and the Method to POST. Leave the Headers and Queries blank.
Body
For the Body, use the following code. Notice how the Item ID is passed into the body from the "When an item is created" output.
{
  "$content-type": "multipart/form-data",
  "$multipart": [
    {
      "headers": {
        "Content-Disposition": "form-data; name=@{outputs('Compose')}query@{outputs('Compose')}"
      },
      "body": "mutation add_file($file: File!) {add_file_to_column (item_id: @{triggerOutputs()?['body/itemId']}, column_id:\"file_mkv0sxev\" file: $file) {id}}"
    },
    {
      "headers": {
        "Content-Disposition": "form-data; name=@{outputs('Compose')}map@{outputs('Compose')}"
      },
      "body": "{\"image\":\"variables.file\"}"
    },
    {
      "headers": {
        "Content-Disposition": "form-data; name=@{outputs('Compose')}image@{outputs('Compose')}; filename=MyDocument.pdf@{outputs('Compose')}"
      },
      "body": @{body('Get_file_content')}
  }
  ]
}
In the code above, you should replace MyDocument.pdf with the name of the file you are uploading.
The column ID in the code above is file_mkv0sxev. You need to replace this with the column ID of your Files column. Below is a section showing how find the column ID of your Files column.
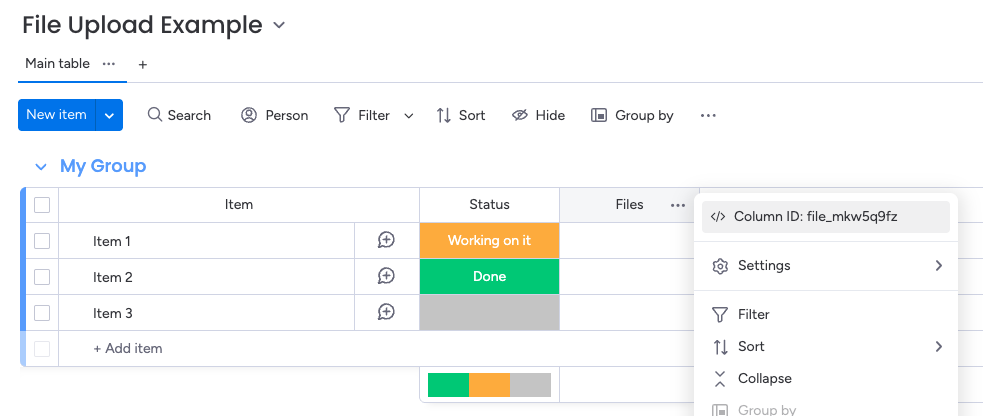
Finding the column ID of your Files column
To find the column ID for your Files column, go to your monday.com board and click the three dots next to the Files column title.
At the top, you can see the ID of the column. Click the column ID and it will automatically copy it to your clipboard. Then paste it into the HTTP action body.
This step is important and it will not work if you don't set the correct column ID.
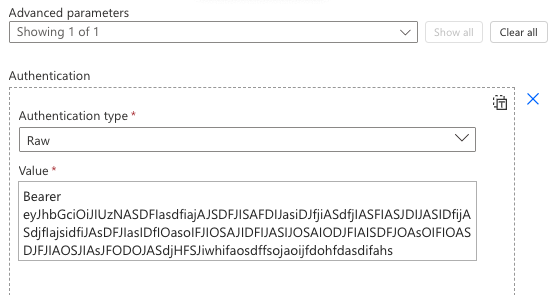
Adding authentication to the HTTP action
Under Advanced Parameters in the HTTP action, click the "Show all" button to show the Authentication section.
Set the Authentication type to Raw.
Finally, you need to add the Authentication to the HTTP action. The authentication Value will be Bearer with your monday.com API token added after this.
You can find your API token by going to your profile picture in the top right corner of monday.com and clicking "Developers". Then click the "API token" in the sidebar to find your API key.
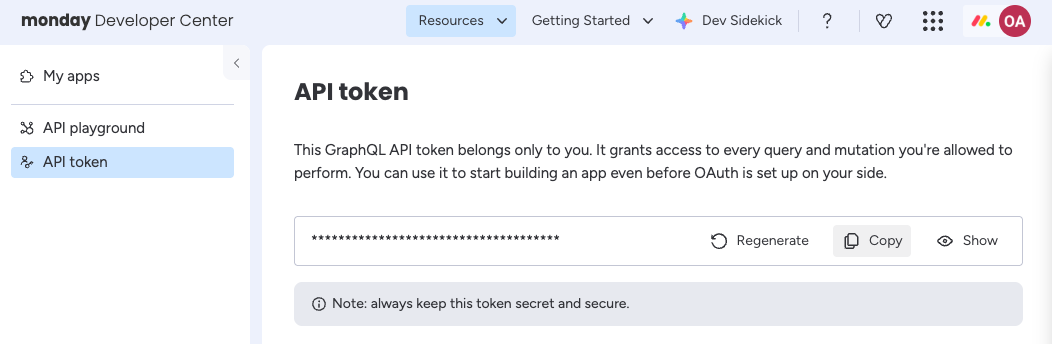
Copy it and paste it into the authentication part of the HTTP action. Make sure to append "Bearer " at the beginning of the API token. There is a single space between the word Bearer and the API token.
Step 5: Save and test the flow
Now that the flow is complete, we can save it and test it out. Click Save in the top right of the screen to save the flow.
Create a new item in your monday.com board to test the flow. After a few moments, you should see the file show up in the Files column for the item.